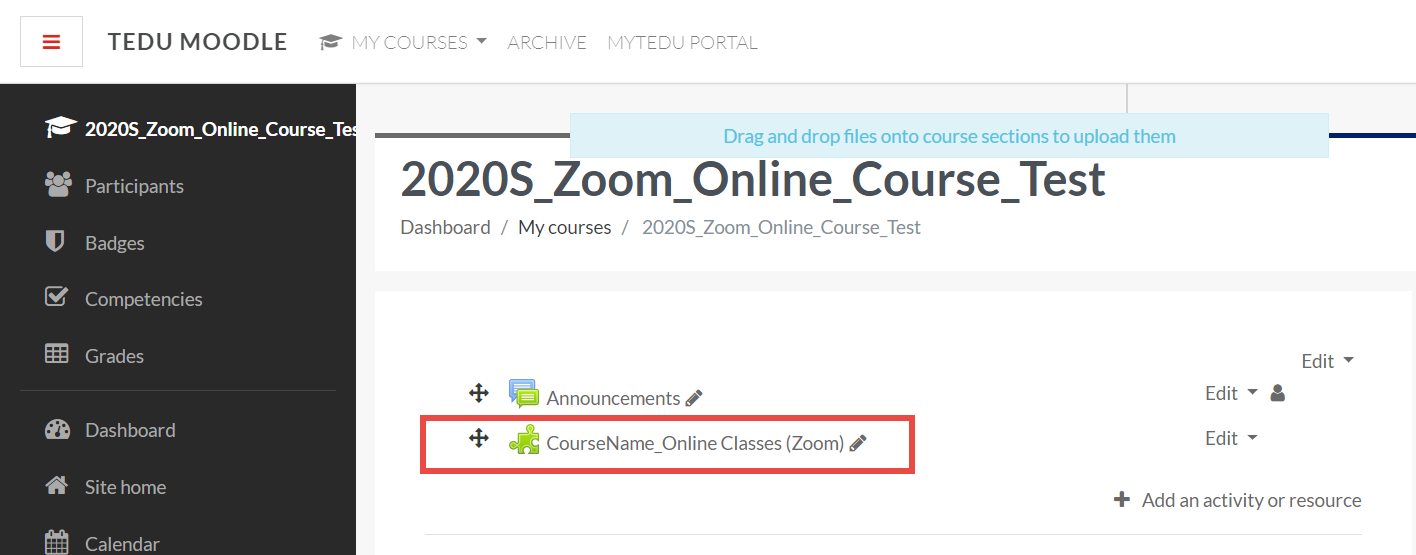
1) To host an class during the scheduled time of the course login to https://moodle.tedu.edu.tr/, find your course within Moodle and click on the Zoom activity you have created before.
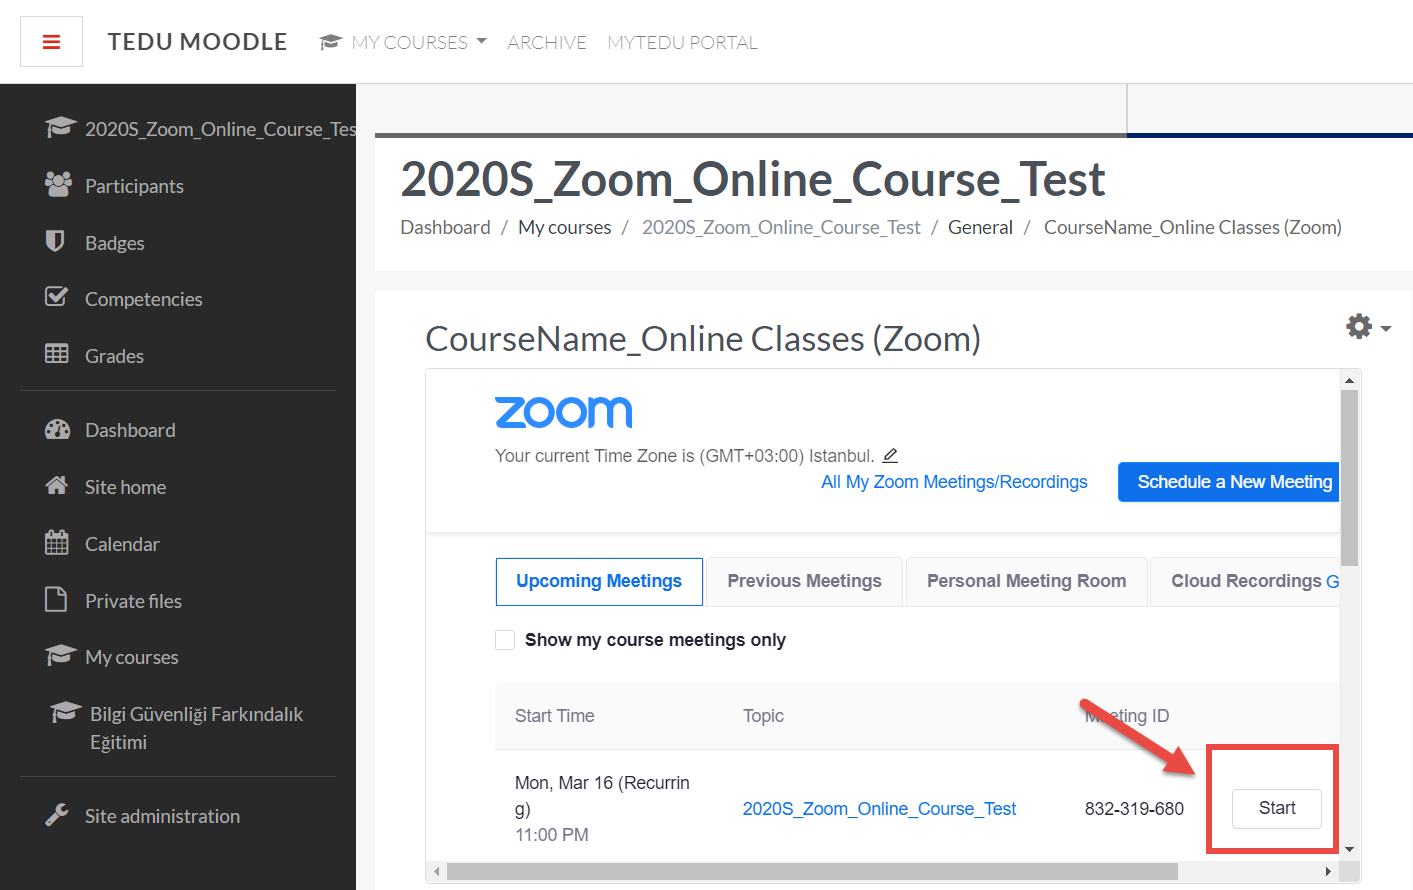
Select the scheduled online class for that time and click on “Start” button to start hosting your online course.
2) Upon clicking “Start” button your browser will be opened and a popup will raise asking to join using Zoom Meeting application installed on your computer. Click on using Zoom Meetings application for an enhanced video conferencing experience.
If you have failed to install the application before please go back to the installation step ( https://remote.tedu.edu.tr/tr/remote/zoom-installation), or if you do not want to install it click on “Cancel” and use “Start from your browser” link at the bottom of the screen.

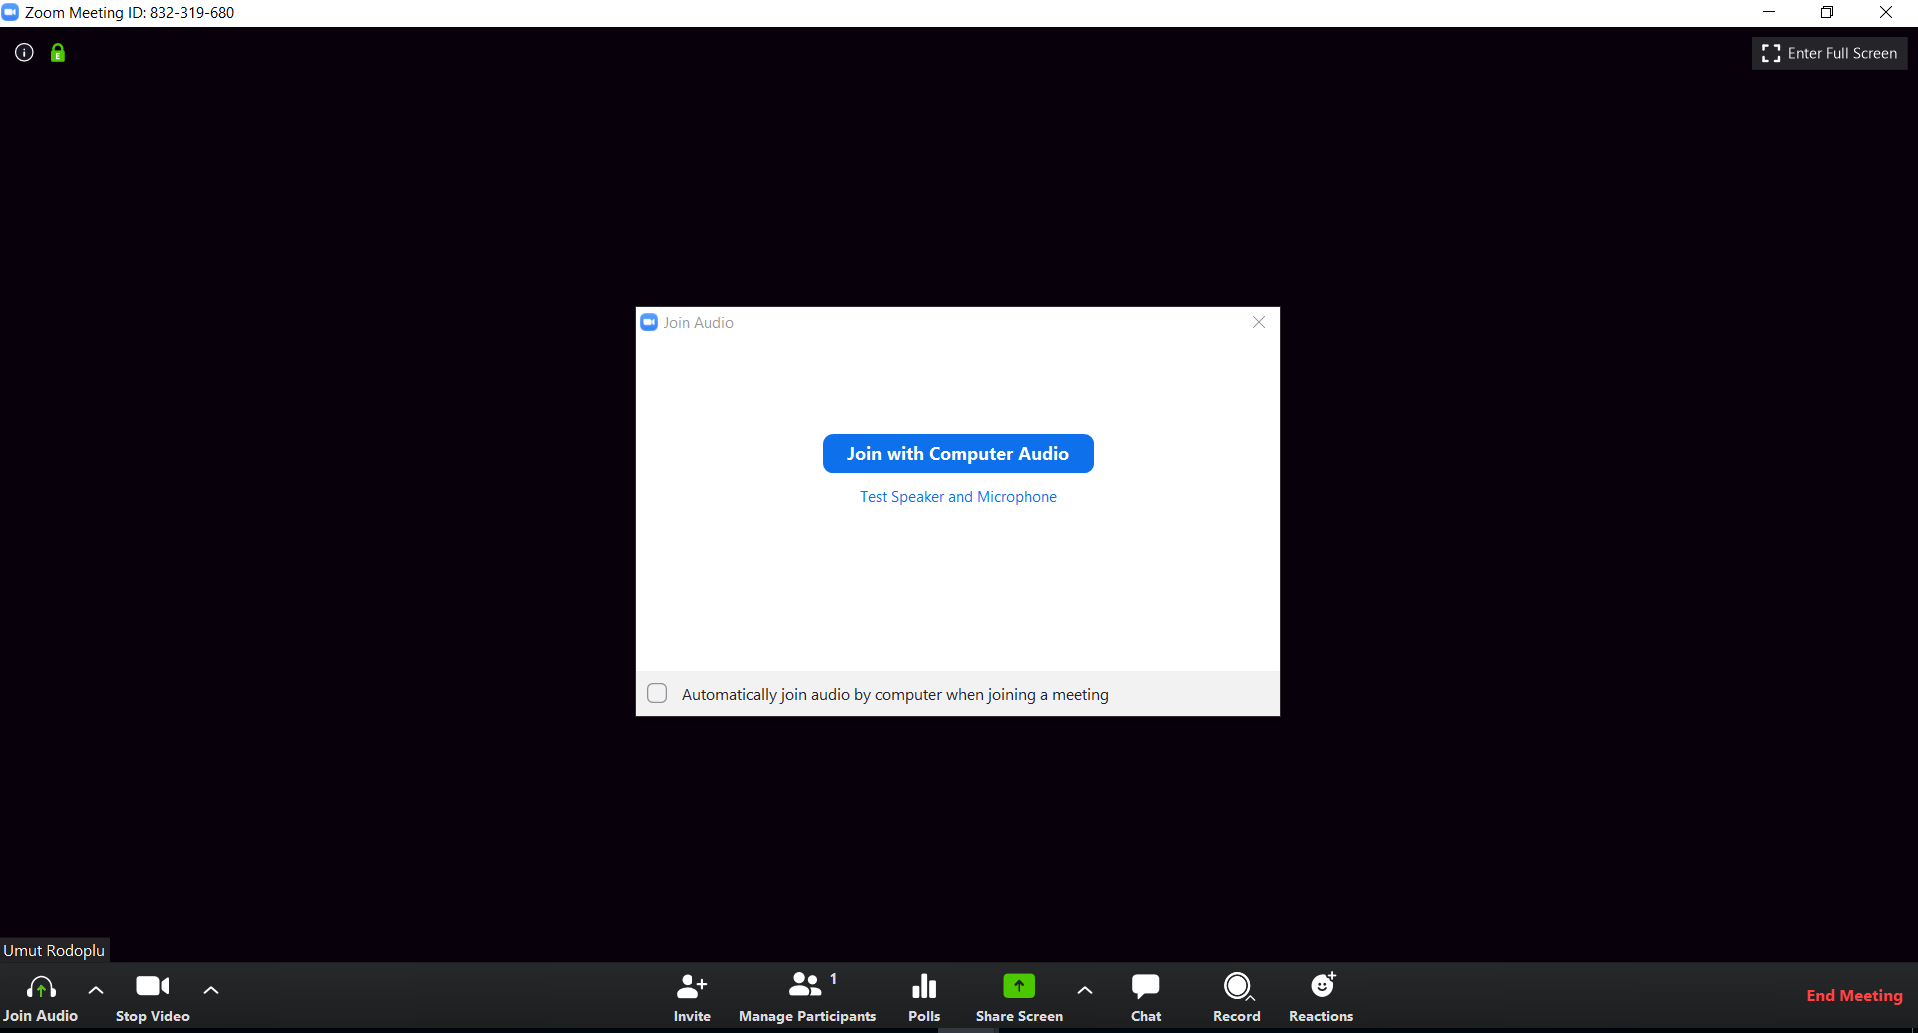
3) Select “Join with Computer Audio” when asked. You can test your speaker and microphone before joining a meeting by clicking on the link below the join option.
4) After you joined the meeting as a host you will have a series of host controls that are available through the menu at the bottom of the meeting window. These controls include;
![]()
a) Mute / Unmute your microphone
b) Start / Stop your video
c) Manage participants: mute/unmute participants, see who’s raising hand

d) Share Screen: you can share whole computer screen or a specific application. You can also use share whiteboard to write some texts and draw shapes that the participants can see.
For more details of screen share: https://support.zoom.us/hc/en-us/articles/201362633-How-Do-I-Start-A-Screen-Share-Meeting-
For more details of sharing a whiteboard: https://support.zoom.us/hc/en-us/articles/205677665-Sharing-a-whiteboard
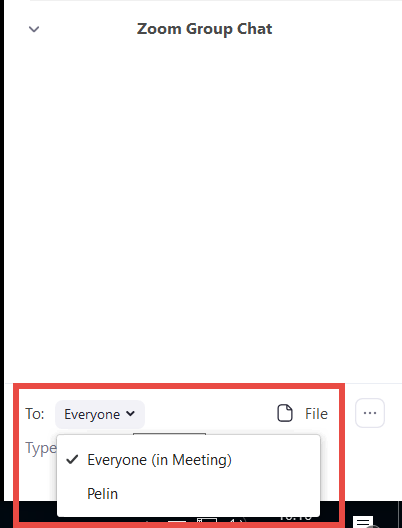
e) Chat: chat with everyone or a specific participant. You can also use this feature to share a file with participants
f) Record: there are 2 options for recording. Recording on the cloud will make the recording available for students to access from Moodle Zoom activity but this is limited to 1 GB per our license. Recording on the computer allows you to save the recording on your computer without any size and time limit.
g) Reactions
h) End Meeting
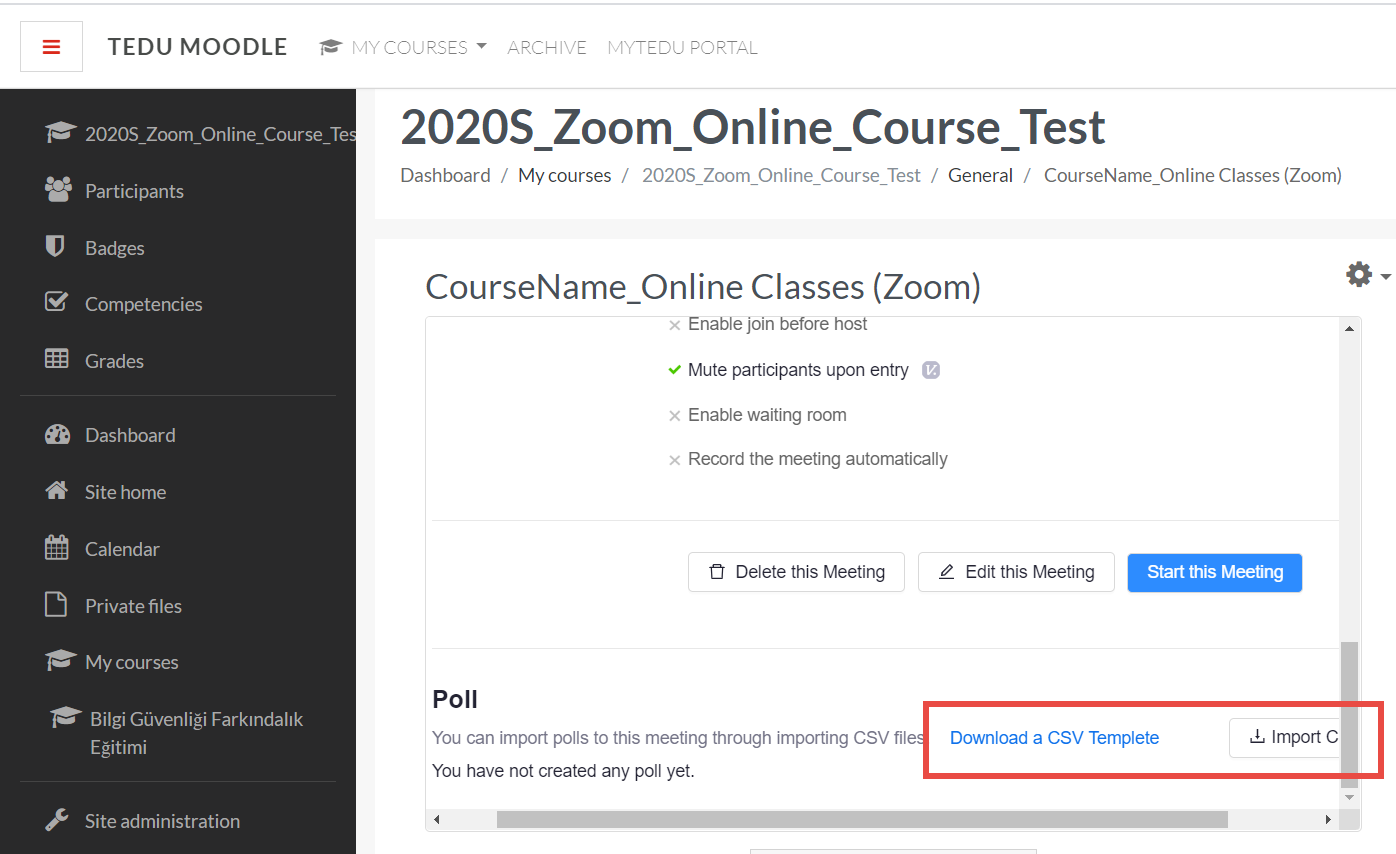
i) Poll: you can create polls to get feedback from participants during the online class. Polls should be created before hosting the online class. Go to the Upcoming Meetings tab in Moodle and click on your scheduled meeting. From the meeting management page, scroll to the bottom to find the Poll option. Download the CSV template for polls, modify the template and import.
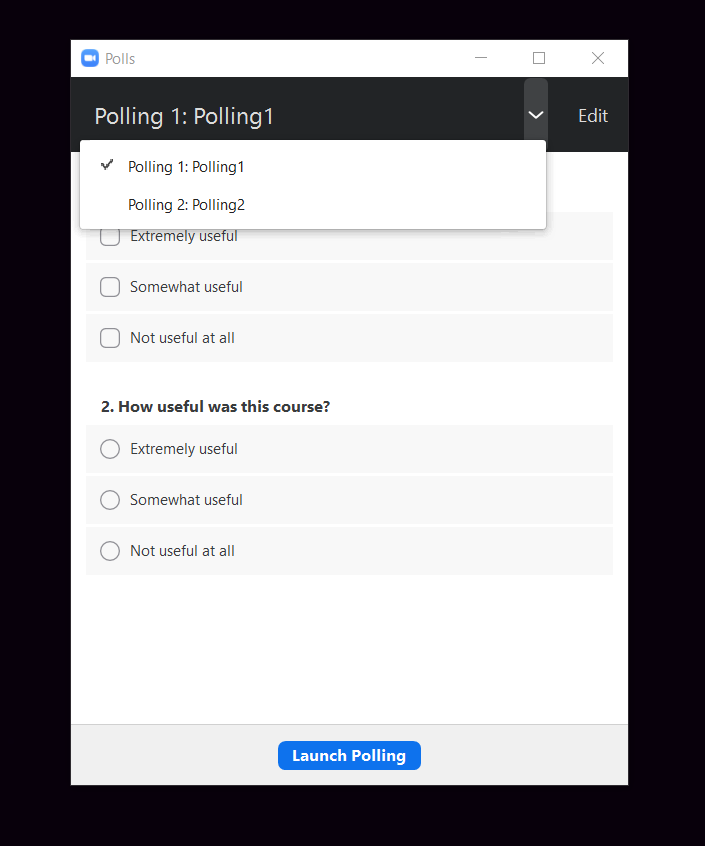
During the meeting click on poll button and select the poll that you would like to launch and click “Launch Polling”. Polls are really useful for getting feedback from users and checking attention.
For more detailed information about the host controls go to
https://support.zoom.us/hc/en-us/articles/201362603-Host-and-Co-Host-Controls-in-a-Meeting
Using a co-host in the meeting
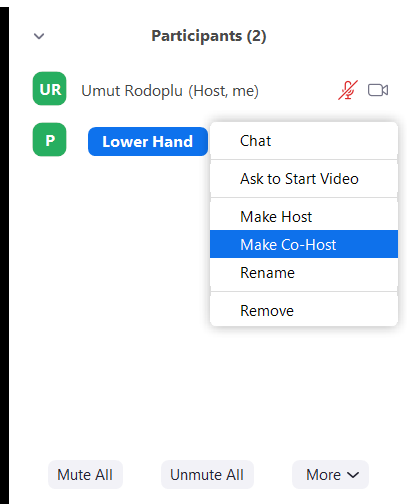
The co-host feature allows you to share hosting privileges with another user in a meeting. This can be useful to allow another user to manage the administrative side of the meeting, such as muting participants, chatting with participants or starting/stopping the recording.
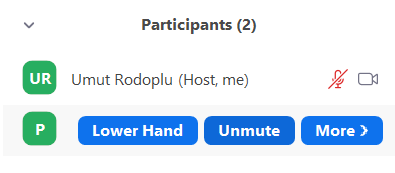
Co-hosts are assigned during a meeting and cannot start a meeting. To assign a co-host open the participants window by clicking “Manage Participants” button. Mouse over to the participant you want to assign as co-host. Click “More” and select “Make Co-Host”.